Tutorial: How to Paint Gundam Eyes Part 2
Intro:
I received a lot of good questions and comments from people after the first How to Paint Gundam Eyes post went up.
One question I received was "What do you do for eye pieces that aren't clear?"
Here's a method you can use the paint Gundam eyes that aren't clear.
Tools:
(Airbrush method)
Non Enamel Primer
Non Enamel Eye Color
Black Enamel Paint
Lighter Fluid
Q Tips
(Paint Brush Method)
Non Enamel Eye Color
Black Enamel Paint
Lighter Fluid
Q Tips
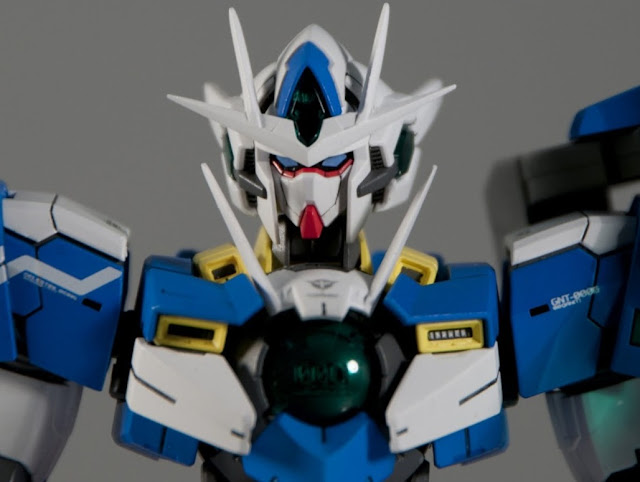
For this example I'm going to use the eye piece from the MG Qan[t]. Although this piece is clear green I want to make the eyes stand out more by using a solid color. You would use this same exact process if your piece is not clear.
Airbrush Method:
Start by masking everything that you don't want to be the eye color.
Prime the eye piece and then apply your eye color.
I must emphasize that you cannot use an Enamel based paint for this step. Acrylic or Lacquer paints will work fine.
Allow the paint to cure completely before the next step.
Now spray the eye piece with the back enamel paint. You must use an enamel based paint for this step. Allow this paint to cure completely before moving onto the next step "Bringing out the Eyes".
Paint brush Method:
If you don't have access to a airbrush don't worry you can still get great looking results.
Find some way to hold the piece you need to paint. Don't worry about masking because you're only going to paint the parts that need to be painted.
Use a wide flat brush and apply a non enamel paint to the eye piece. Try to use a minimal number of brush strokes to achieve an even finish. Don't apply too much paint either, you don't want to change the shape of the eyes with excess dried paint.
I must emphasize that you cannot use an Enamel based paint for this step. Acrylic paint will work fine.
Once this piece has dried completely move onto the next step.
Use your wide flat brush to apply a layer of black enamel paint to the eye piece. You must use an enamel based paint for this step. Allow this paint to cure completely before moving onto the next step "Bringing out the Eyes".
Bringing out the Eyes:
Apply a very small amount of lighter fluid to a Q -Tip and gently rub away the black enamel from the raise eye pieces. If you accidentally remove too much paint, go back and reapply another layer of black enamel and try again.
Allow the part to rest for a hour or two in case the surrounding enamel has been softened by the lighter fluid. Then reassemble the head.
You should now have a set of great looking eyes!
Leave a comment below if you have any questions or suggestions!


Awesome, thanks for this post. Right now I just use gundam markers to paint the eyes. The only reason i haven't moved on to painting with a brush is I get confused with which paints to use first and what chemical removes what paint. Thanks for spelling it out clearly here.
ReplyDeleteThis is a technique I've seen used for a LOT of different things, that I really need to get around to trying. This technique made THE BEST looking Sinanju/Kshatriya crests I've ever seen.
ReplyDeleteThis is called a 'reverse wash' technique. And you're right this technique does have a lot of applications. I also used it on the HG and MG Sinanju.
DeleteNice! I will try this. I usually paint the surrounding area around the eye black with paint, and then cut out eye part of the stickers provided. And then I just stick it over the uncolour eye.
ReplyDeleteGive it a shot! This technique works best on kits with larger eyes.
DeleteHow well do you think this would work if you wanted the eyes to stay clear (I'm using LED's). Would just skipping the primer step and using a clear color as the eye color be fine?
ReplyDeleteYes, that would be the recommended technique.
Delete