
Project HGUC Sinanju Start to Finish: Painting
If you have been following along with the previous two sections, you should now have a clean, completed, and modified Sinanju ready for painting.
For the next several steps I'm going to assume the following things; you have some experience painting and that you have access to either an air brush or to spray cans.
If you're following along, please read this entire post before continuing! Not all of the steps are in the correct chronological order!
For this kit, I'm going to be using the follow airbrush paints from Plamo UK
Silver
Clear Red
Gold
Gunmetal
Black
Gloss Clearcoat
White
I will also be using one color of Modelmasters enamel paint, but only for the sleeve detail
Black
I will be using my airbrush for this entire section.
For reference I use a Badger Renegade Krome dual action gravity feed brush, a generic water trap & a badger compressor, and I spray at 30psi.
Here are a few tips to consider when you're painting
My Sinanju has dried completely after his bath in the last segment, and I have put all of the parts onto bamboo skweres using alligator clips. And I'm going to prime the whole kit. White primer for the white parts, and gray primer for everything else.
I typically paint by color group to save time and paint. For this kit I'm going to start with the white parts.
We're starting with white to facilitate the masking process listed a few steps down.
I'm going for an 'extra finish' style paint job for these parts. To achieve this, we're going to do two layers of paint, first we'll lay down a coat of silver. I'll note that some modelers will lay down a black coat before the silver to add depth to the metallic. However I don't do this step, I don't believe that this step creates a noticable difference and it wastes paint.
Please read the micro thruster detail section below before doing this step.
Okay our shiney silver coat looks good.

Then we're going to lay down a coat of clear red over the silver paint.
There really isn't a trick to laying down the clear coat, just try to spray consistently and with an equal number of layers. If you go over one area to heavily, it will likely be darker than the surrounding areas.

I'm going to continue the metallic theme with the frame parts. I'm using a gunmetal color here mixed with some black. I want a dark color to contrast well with the red of the armor.

I have found that with metallic paint you want to use a wider aperture nozzel. For me that means changing out the .21 nozzel for a .33 nozzel. The .21 nozzel will sometimes get plugged by the metallic flakes.
This step really needs to be done concurrently with the general panting step.
We want all of the little thrusters on the legs, shoulders, forearms and knees to be a different color than the surronding areas. To accomplish this we're going to spray those areas with gold.
You don't need to go over all the whole part, just the areas that need it.


Once you're satisfied with the coverage/color we're going to mask those areas with some low tack masking tape. I'm using tamiya's brand of modeling tape.
There are a couple of ways of masking these areas, I'm going to show you my two favorite methods.


Your parts should look like this once you're done masking.


Now that the parts have been masked we're going to do the extra finish coat mentioned above.
The result should look like this.


You might notice that we have a little more gold than we need. We're going to use some enamel wash to 'fill in' the crevices .
We're going to use a cotton bud lightly dipped in lighter fluid to remove some of the enamel paint.
Voila you now have a perfect little gold truster detail.


These are comparitively easy to do.
We first start by painting the whole thing inside and out black.
Then we use some blue-tack for masking, try to keep it off the lip of the bell.

Then we spray the outside with silver.

You can see a couple of black marks from where the blue-tack sat on the lip. To fix this I hand brushed a bit of Tamiya silver. It's not a perfect match, but it looks better than leaving it black.
These aren't too bad either, and they offer some nice detail.
We have already sprayed the 'extra finish' style paint job on this part
Take some masking tape and mask the 'face' leaving the vulcans exposed.

Then spray it with the gunmetal mixture from the frame.

You paint the vulcans on the MG and 1/48 head display the same way!
The tanks will require the most masking out of all the parts on this kit.
Start by painting the whole part with white.
Now that's done we're going to mask everything but the thruster details at one end, and the ball joint at the other end like so.

We're going to spray the exposed parts with the frames gunmetal mixture.

We're goint to paint the rifle silver to start.
Then we're going to mask the following detail parts.

Then we're going to spray the entire rifle with the Gunmetal mixed with black.


Before we spray the extra finish, we're going to spray gold in the front channel. Once it's dry we're going to apply the decals for a mask. Make sure you stick them to you hands/shirt before you stick them to the plastic, we want to lower their tackiness.

Spray the extra finish and then remove the mask on the front.
Then we'll mask the inner portions of the shield.

We're going to use the same dark gunmetal from the rifle to paint the inner detail of the shield.

Now you have a fully detailed shield.


After spraying the gunmetal color on the part we're going to use a brush to add a bit of clear green tamiya acrylic to the tip of the eye.

The eye isn't very visible even on the larger MG or 1/48 head display, so you can skip this step if you want.
This can be the most frustrating part of the build if you rush it. Take your time, make sure everything is dry and it will come out looking great.
We're going to start by painting everything with a lacquer gold.
Then we're going to add a layer of glossy clear coat to protect the gold coat and to add gloss. You can skip this step if you want.
Once the gold/clearcoat has dried, spray a layer of black enamel over all the parts.
Allow the enamel to dry completely. This can take a while depending on your thinning ratios, weather and heaviness of the coat. If the paint is still wet it will pull some of the fluff off of your cotton buds.
It's important that you're using lighter fluid for this step and not enamel thinner. Enamel thinner will also remove lacquer paint.
Once the black as dried completely, we're going to take some cotton buds and lightly dip them in lighter fluid. You do not want them to be saturated with lighter fluid. we're going to lightly wipe them over the raised areas of the sleeve detail.


After several minutes and several cotton buds we have a clean part.
If you happen to slip up and remove some of the black paint, you can fix it, but it requires repainting the area missing paint.
You can cheat on the shield. Paint the whole shield with gold lacquer and allot it to dry. Take the gold foil decals stick them to your hands/shirt and then lay them down in the appropriate places as a mask. Spray the whole thing with black enamel and then use your cotton buds & lighter fluid to clean up the emblem.


I messed up quite a few pieces so I'll be repainting and trying again.
Swap out cotton buds, I think I used at least 3-4 buds per part.
When you're removing the enamel wipe from the edge of the raised area into the center, you're less likely to slip this way.
Don't push straight down into the part with your cotton bud, try to apply pressure at a 45 degree angle in a sliding motion.


So at this point you might be thinking, 'well this kits done'. And for many builders you would be correct. But I'm going to take it one step further by giving the kit the full ver. ka decal treatment, some limited panel lining and then we'll finish it off with a glossy topcoat.
Stay tuned!
And as always, if you have any questions please leave a comment below.
Go back to: Part 3
Go forward to: Part 5
For the next several steps I'm going to assume the following things; you have some experience painting and that you have access to either an air brush or to spray cans.
If you're following along, please read this entire post before continuing! Not all of the steps are in the correct chronological order!
For this kit, I'm going to be using the follow airbrush paints from Plamo UK
Silver
Clear Red
Gold
Gunmetal
Black
Gloss Clearcoat
White
I will also be using one color of Modelmasters enamel paint, but only for the sleeve detail
Black
I will be using my airbrush for this entire section.
For reference I use a Badger Renegade Krome dual action gravity feed brush, a generic water trap & a badger compressor, and I spray at 30psi.
Quick Tips
Here are a few tips to consider when you're painting
- If you're using an airbrush, make sure you're thinning to the correct ratio. If you don't use enough thinner your paint job will be rough, and if you use too much it will take way too many coats.
- Multiple thin coats of paint 2-3 are preferable to 1 thick coat.
- Wait for good weather, the environment will greatly effect how you paint job turns out. Try to avoid overly humid weather. This tip just takes time to learn because every climate is different.
- Make sure the surface you're painting is clean. Dust, hair and pollen settling on the plastic will ruin your smooth paint job in a heartbeat.
- Always prime your parts before painting. It doesn't matter if you're using lacquer, enamel or acrylic. Primer helps paint adhere, and will protect the plastic from thinners that might make the plastic brittle.
- If you're using a custom mixed color, always make more than you think you'll need, and keep some clean empty containers around to save your mixes. You don't want to run out of a custom color before you're done or if you need to repaint a part. Because you're never going to mix a second batch that's 100% accurate to the first.
General Painting
My Sinanju has dried completely after his bath in the last segment, and I have put all of the parts onto bamboo skweres using alligator clips. And I'm going to prime the whole kit. White primer for the white parts, and gray primer for everything else.
Propellant Tanks and Thruster detail
I typically paint by color group to save time and paint. For this kit I'm going to start with the white parts.
We're starting with white to facilitate the masking process listed a few steps down.
Red Armor
I'm going for an 'extra finish' style paint job for these parts. To achieve this, we're going to do two layers of paint, first we'll lay down a coat of silver. I'll note that some modelers will lay down a black coat before the silver to add depth to the metallic. However I don't do this step, I don't believe that this step creates a noticable difference and it wastes paint.
Please read the micro thruster detail section below before doing this step.
Okay our shiney silver coat looks good.

Then we're going to lay down a coat of clear red over the silver paint.
There really isn't a trick to laying down the clear coat, just try to spray consistently and with an equal number of layers. If you go over one area to heavily, it will likely be darker than the surrounding areas.

Frame
I'm going to continue the metallic theme with the frame parts. I'm using a gunmetal color here mixed with some black. I want a dark color to contrast well with the red of the armor.

I have found that with metallic paint you want to use a wider aperture nozzel. For me that means changing out the .21 nozzel for a .33 nozzel. The .21 nozzel will sometimes get plugged by the metallic flakes.
Masking and Details
This step really needs to be done concurrently with the general panting step.
Micro Thrusters
We want all of the little thrusters on the legs, shoulders, forearms and knees to be a different color than the surronding areas. To accomplish this we're going to spray those areas with gold.
You don't need to go over all the whole part, just the areas that need it.


Once you're satisfied with the coverage/color we're going to mask those areas with some low tack masking tape. I'm using tamiya's brand of modeling tape.
There are a couple of ways of masking these areas, I'm going to show you my two favorite methods.
Pokey method
Lay a small piece of masking tape over the area you intend on covering. Use a needle to poke holes around the area until you've created a perimeter. If you're really thorough when you go to lift the tape up, the masked areas should remain on the part. If not go ahead and cut out the shapes and replace them.


Your parts should look like this once you're done masking.
Pencil method
Essentially we're doing the same thing using this method. Lay a peice of masking tap down, and then run the side of a pencil over the area a few times until you get a nice outline like this. Remove the masking tape, cutout the shape and replace the tape. Typically this method works best on complex shapes.


Now that the parts have been masked we're going to do the extra finish coat mentioned above.
The result should look like this.


You might notice that we have a little more gold than we need. We're going to use some enamel wash to 'fill in' the crevices .
We're going to use a cotton bud lightly dipped in lighter fluid to remove some of the enamel paint.
Voila you now have a perfect little gold truster detail.


Thruster Bells
These are comparitively easy to do.
We first start by painting the whole thing inside and out black.
Then we use some blue-tack for masking, try to keep it off the lip of the bell.

Then we spray the outside with silver.

You can see a couple of black marks from where the blue-tack sat on the lip. To fix this I hand brushed a bit of Tamiya silver. It's not a perfect match, but it looks better than leaving it black.

Head Vulcans
These aren't too bad either, and they offer some nice detail.
We have already sprayed the 'extra finish' style paint job on this part
Take some masking tape and mask the 'face' leaving the vulcans exposed.

Then spray it with the gunmetal mixture from the frame.

You paint the vulcans on the MG and 1/48 head display the same way!
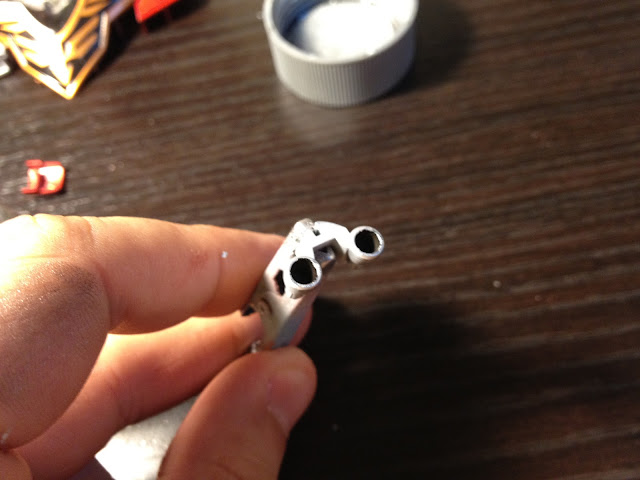
Propellant Tanks
The tanks will require the most masking out of all the parts on this kit.
Start by painting the whole part with white.
Now that's done we're going to mask everything but the thruster details at one end, and the ball joint at the other end like so.

We're going to spray the exposed parts with the frames gunmetal mixture.

Rifle
Both the gernade launcher and rifle require a bit of work to bring out their full potential.We're goint to paint the rifle silver to start.
Then we're going to mask the following detail parts.

Then we're going to spray the entire rifle with the Gunmetal mixed with black.


Shield
We're going to spray the entire shield with the 'extra finish' paint job to match the rest of the kit. But we also need to add detail to the front and back of the shield.Before we spray the extra finish, we're going to spray gold in the front channel. Once it's dry we're going to apply the decals for a mask. Make sure you stick them to you hands/shirt before you stick them to the plastic, we want to lower their tackiness.

Spray the extra finish and then remove the mask on the front.
Then we'll mask the inner portions of the shield.

We're going to use the same dark gunmetal from the rifle to paint the inner detail of the shield.

Now you have a fully detailed shield.
Misc Masking
You can add some additional detail by masking the following areas
Silver paint first


Paint this part in gunmetal

Gunmetal first, then mask off the lower area and paint the piece black.
Mono Eye
We're going to be doing a portion of this step with a brush.After spraying the gunmetal color on the part we're going to use a brush to add a bit of clear green tamiya acrylic to the tip of the eye.

The eye isn't very visible even on the larger MG or 1/48 head display, so you can skip this step if you want.
Sleeve Detail
This can be the most frustrating part of the build if you rush it. Take your time, make sure everything is dry and it will come out looking great.
We're going to start by painting everything with a lacquer gold.
Then we're going to add a layer of glossy clear coat to protect the gold coat and to add gloss. You can skip this step if you want.
Once the gold/clearcoat has dried, spray a layer of black enamel over all the parts.
Allow the enamel to dry completely. This can take a while depending on your thinning ratios, weather and heaviness of the coat. If the paint is still wet it will pull some of the fluff off of your cotton buds.
It's important that you're using lighter fluid for this step and not enamel thinner. Enamel thinner will also remove lacquer paint.
Once the black as dried completely, we're going to take some cotton buds and lightly dip them in lighter fluid. You do not want them to be saturated with lighter fluid. we're going to lightly wipe them over the raised areas of the sleeve detail.


After several minutes and several cotton buds we have a clean part.
If you happen to slip up and remove some of the black paint, you can fix it, but it requires repainting the area missing paint.
You can cheat on the shield. Paint the whole shield with gold lacquer and allot it to dry. Take the gold foil decals stick them to your hands/shirt and then lay them down in the appropriate places as a mask. Spray the whole thing with black enamel and then use your cotton buds & lighter fluid to clean up the emblem.


I messed up quite a few pieces so I'll be repainting and trying again.
Here are a couple of tips:
There is no 'silver bullet' this step takes time and patients and a ton of cotton buds.Swap out cotton buds, I think I used at least 3-4 buds per part.
When you're removing the enamel wipe from the edge of the raised area into the center, you're less likely to slip this way.
Don't push straight down into the part with your cotton bud, try to apply pressure at a 45 degree angle in a sliding motion.
Next Episode


So at this point you might be thinking, 'well this kits done'. And for many builders you would be correct. But I'm going to take it one step further by giving the kit the full ver. ka decal treatment, some limited panel lining and then we'll finish it off with a glossy topcoat.
Stay tuned!
And as always, if you have any questions please leave a comment below.
Go back to: Part 3
Go forward to: Part 5
Looking great! Very good explanation of for everything but especially nice demonstration of the reverse wash technique. You just helped a lot of people out.
ReplyDeleteThanks, I'm hoping some people are following along, I'd love to see there work if they are.
Delete