
Tutorial: Scratched/damaged paint repair
While assembling my Sazabi ver Ka I accidentally scratched the paint and ruined a decal on one of the prominent chest pieces. This is the process that I followed to completely remediate the damage.
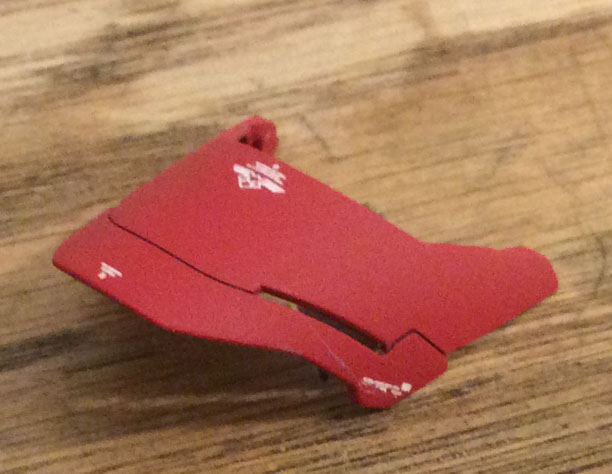
This image isn't the clearest, but the decal and paint have been scratched off. The paint was scratched all of the way down to the plastic around the edge where the decal used to be.
Preparation:
To repair this area there are a few considerations I had to take into account:

The first step was to remove the damaged and matching decal. This can be done by placing masking tape over the decal and carefully pealing it off.

I then used 2000 grit sand paper to level the topcoat, paint and primer. This is the most important step to getting a consistent finish. If you can feel the transition from painted to unpainted with the tip of your fingernail than the transition will be noticeable.

I tinted mr surfacer 1200 with a few drops of the red colored paint I used to paint the part. (Tinting the paint isn't nessecary, I had some red paint leftover in my airbrush.) because I needed to retain the decals towards the median of the part I sprayed away from the median of the part.

Once the primer cured I followed with a few light coats of red until the color on the repaired area was consistent. At this point I allowed the paint to cure over night because it was close to midnight.

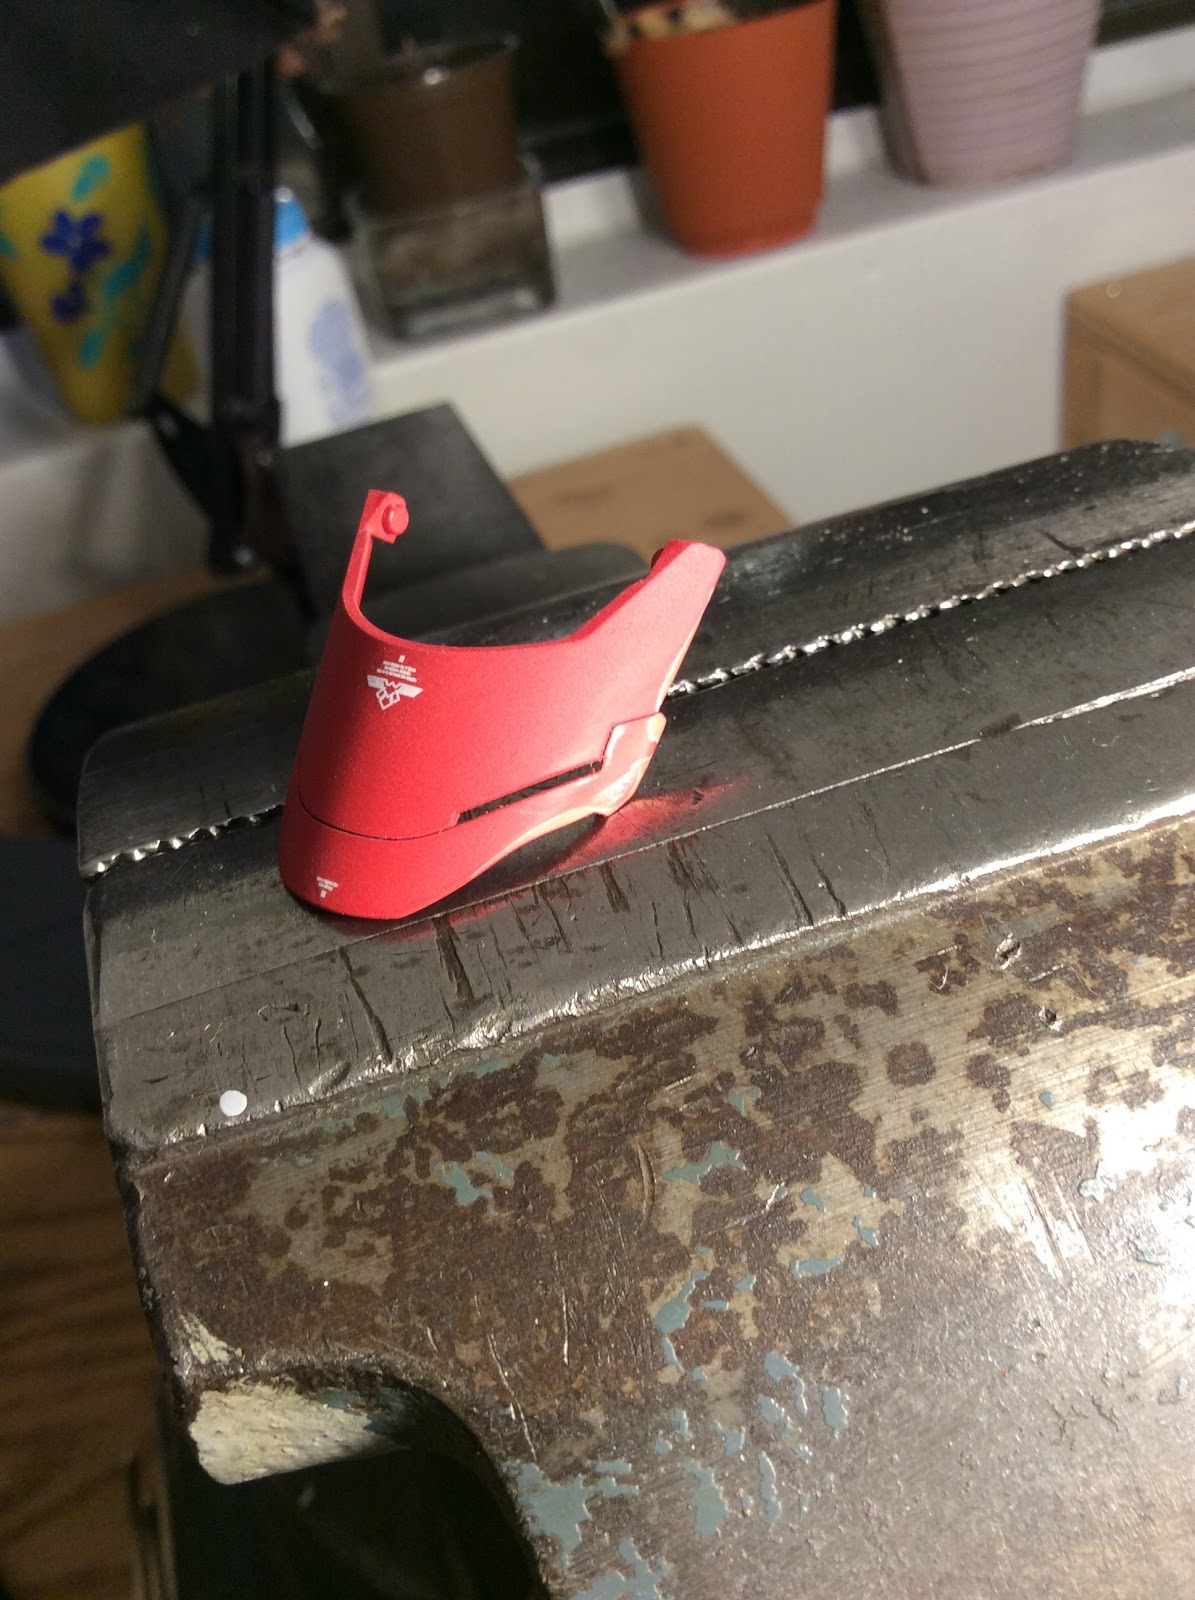
The following day I completed relining the piece using Tamiya black panel lining solution.

I found some donor decals on an old MG Sinanju decal sheet (#79 & 80) which were very similar to the decals originally on the Sazabi. I applied the decals and allowed them to set for an hour.


In most cases especially when decals aren't an issue simply stripping and reprinting the kit is the easier solution. However, if that isn't an option for then this is an easy way of fixing scratches or damaged paint.

This image isn't the clearest, but the decal and paint have been scratched off. The paint was scratched all of the way down to the plastic around the edge where the decal used to be.
Preparation:
To repair this area there are a few considerations I had to take into account:
- The damaged decal and the matching decal on the other side needed to be removed and replaced.
- The topcoat and paint in the effected areas needed to be leveled for a consistent finish.
- I want to keep the two decals that are situated near the median of the part.
I also needed a few tools and materials on hand
Process:
- Masking tape
- High Grit (2000) sand paper
- Color matched paint
- Airbrush
- Decals
- Topcoat
Hit the bump for the full tutorial process!
Process:

The first step was to remove the damaged and matching decal. This can be done by placing masking tape over the decal and carefully pealing it off.
I then used 2000 grit sand paper to level the topcoat, paint and primer. This is the most important step to getting a consistent finish. If you can feel the transition from painted to unpainted with the tip of your fingernail than the transition will be noticeable.

I tinted mr surfacer 1200 with a few drops of the red colored paint I used to paint the part. (Tinting the paint isn't nessecary, I had some red paint leftover in my airbrush.) because I needed to retain the decals towards the median of the part I sprayed away from the median of the part.

Once the primer cured I followed with a few light coats of red until the color on the repaired area was consistent. At this point I allowed the paint to cure over night because it was close to midnight.

The following day I completed relining the piece using Tamiya black panel lining solution.

I found some donor decals on an old MG Sinanju decal sheet (#79 & 80) which were very similar to the decals originally on the Sazabi. I applied the decals and allowed them to set for an hour.

I topcoated the kit using Mr. Color flat clear. I sprayed several layers all over the piece until the finish became consistent.

In most cases especially when decals aren't an issue simply stripping and reprinting the kit is the easier solution. However, if that isn't an option for then this is an easy way of fixing scratches or damaged paint.
Comments
Post a Comment