
Review: Real Grade MSN-04 Sazabi

Intro:
I'm not going to start this review off by waxing philosophical, sharing lore or making funny quips. Let's get right down to it. The RG Sazabi is a fantastic kit. If you haven't already ordered one, then stop here, place an order and come back, you'll thank me later.
On that note, this kit was provided to me by JoJoHobbyNStuff. Use coupon code "GOODGUNPLA" to receive 10% off your order on this kit, or most other items for sale on the site!
I'll start off by saying that the RG Sazabi doesn't feel like a Real Grade, it feels more like a 1/144 scale Master Grade. I mentioned that feeling several times during the two streams (Part 1, Part 2) over the weekend. My reasoning is that it:
- Is as large as an MG kit both in stature and part count
- Has the same level of complexity and detail as an MG
- Features a full inner frame, that doesn't rely on the 'Advanced MS' frame
- Has a price similar to an MG
I built this kit over the course of two sessions, the first being nearly six hours and the second about an hour and a half. I don't recommend building this kit in this way; this build really deserves to be savored.
The RG Sazabi's box includes 17 plates of runners including:
The RG Sazabi's box includes 17 plates of runners including:
- Red, salmon, yellow, grey and black runners
- 1 small runner of Advanced MS joints
- 2 beam effect runners in semi-translucent yellow

Standing 18cm, the RG Sazabi towers over other 1/144 scale kits (12-13cm). The wide cowls along the feet, enlarged tail binder and massive shoulders and fuel tanks further add to the bulk of the design. The RG Sazabi truly dwarfs other models in the 1/144 scale.
The RG Sazabi's manual begins the build at the feet and works its way up the body. I'll follow the same pathway for the purpose of this review.
Feet:

The scale is hard to judge by the photo, for reference the Sazabi's foot is about twice as long and wide as the Efreet pictured above.


The feet feature several points of articulation at the toe, midsole, and heel. The second 'strap' by the ankle is on a hinge and can move forward to allow the ankle to bend more deeply.
Legs:

The bulky leg design doesn't look very flexible, but the range of articulation puts the MG Sazabi Ver. Ka to shame.


The black and red components at the knee move independently of one another.

The front element of the leg is on a double-jointed hinge that allows it to move out of the way.

Beneath the cowling on the legs, there are two groups of verniers. The large vernier can pull out of the leg on a set of two hinges. The group of three verniers at the back of the leg can move forwards towards the foot.
Waist:

Inside of the waist, the leg/hip connection can move on an arched track for added mobility.

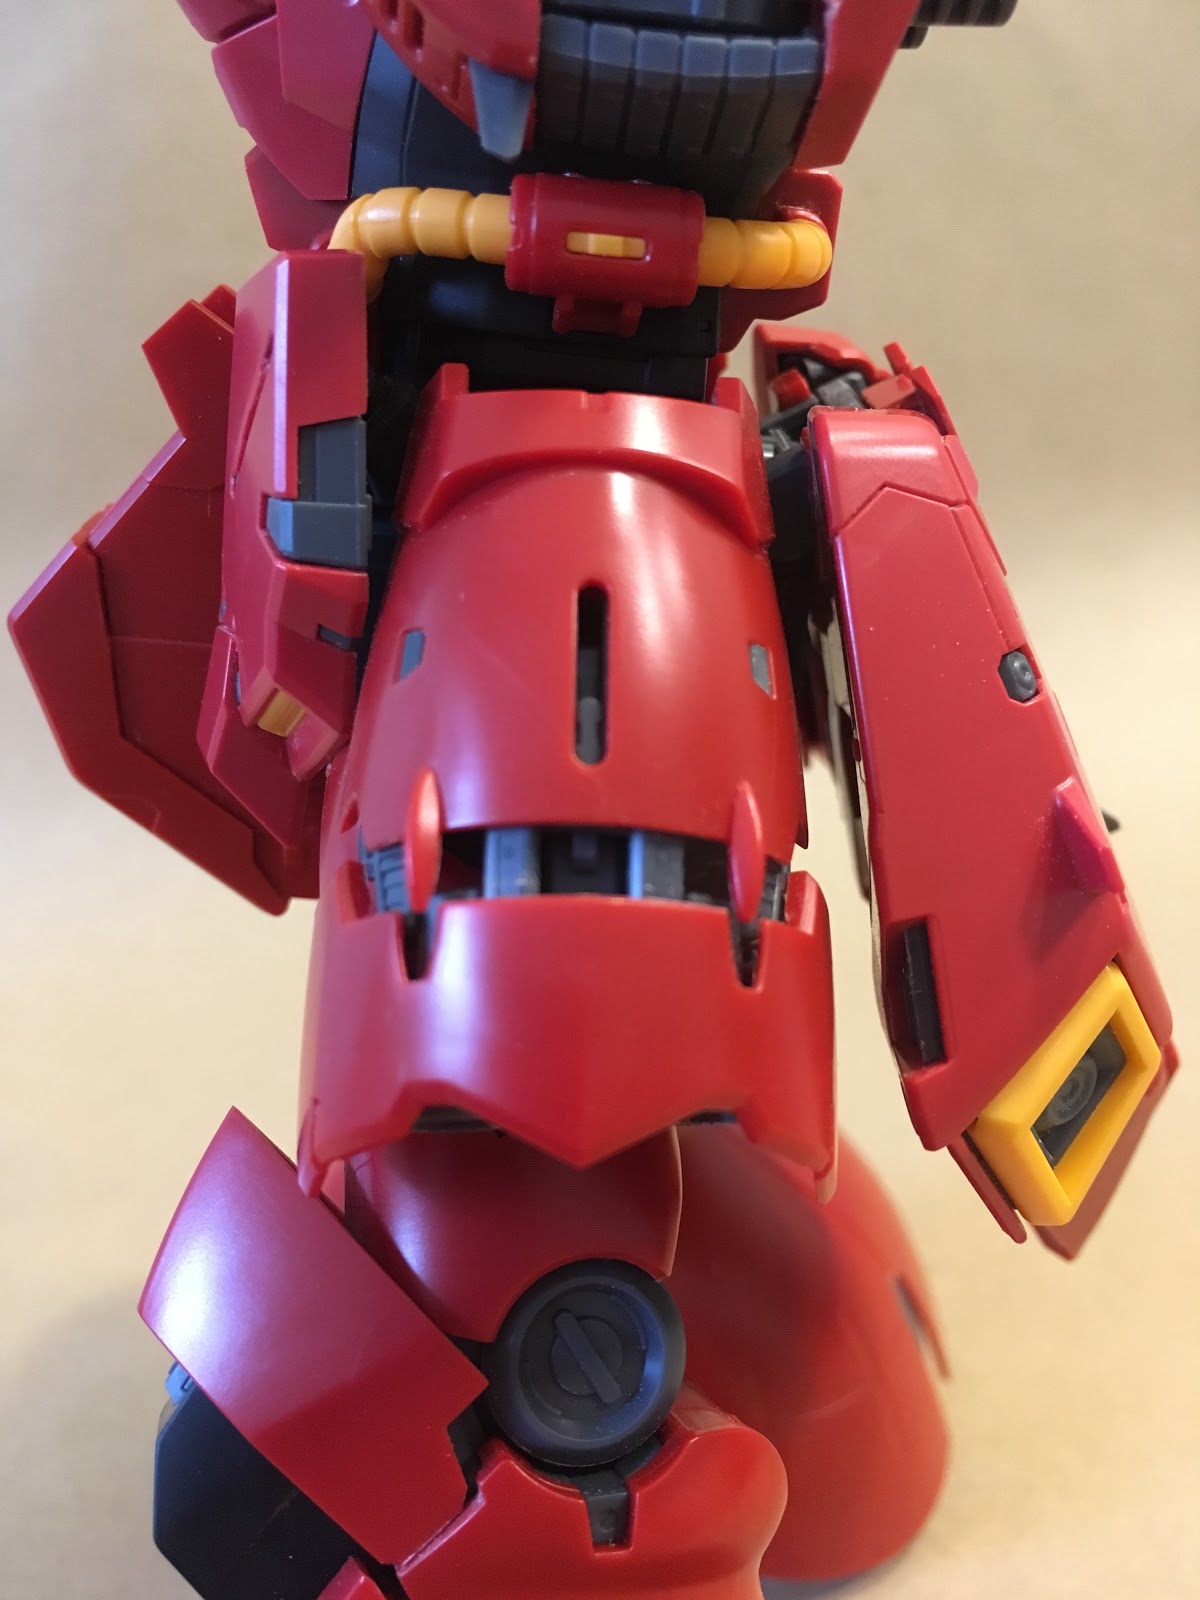
The side skirts are able to open and close to reveal additional internal detail.


Also notice all of the grey inner frame elements emerging through the front skirts. This is a common design motif seen throughout this kit.

The plate at the top of the waist is the first part used on the 'Advanced MS Joint'. It is incorporated into the kit in such a way so that the torso can lean left or right, and the front and side skirts can move independently. The front and side skirts can also move as a unit, out and away from the center of the body to facilitate a deep kneeling pose.


The waist is dominated by the large tail binder, which like the MG is able to open up to reveal more internal detail.
Torso:


Apparently, some builders have encountered issues during the assembly of the chest and shoulder connection. The three segments of this joint are each directional, so pay close attention to the instructions when building this segment. Additionally, when inserting the joint into the chest, it needs to be pushed all the way down into the peg. In a partially assembled state this area is a bit fragile; use common sense and be gentle!
The shoulder joint has 3 points of articulation that provide a wide range of movement.
The power cable running around the waist is a solid piece like an HG. I prefer this type of construction over the power cables on the RG Zaku, as in my opinion, it's easier, less frustrating to assemble and looks better.


The torso is built around the central 'nose cone' section of the chest. This allows the kit to bend forward and back.
Arms & Shoulders:


The shoulders feature the second set of 'Advanced MS Joint' components. This allows for the front of the shoulders to move up and out of the way, allowing the arms to rotate to be perpendicular to the body.

The ends of the shoulders are able to slide out, revealing additional heatsinks molded into the inner frame.

The ends of the shoulders are able to slide out, revealing additional heatsinks molded into the inner frame.


The side elements of the shoulder hide a set of 3 verniers beneath the armor. This entire section is on a hinge.


The arms have a wide range of articulation, and this movement reveals a nice set of pistons hidden in the back of the arm.


The trigger finger and melee hands have a hinge joint at the wrist that allows the hand to perform extension and flexion. This is a gimmick that I would like to see on future releases, as it's simple and very effective.
Head:


The Sazabi comes with a variety of hands. A set for holding melee weapons, a trigger finger, closed and opened hands. One really cool element included on some of the hands is that the cover can be peeled up to reveal the decoy launchers behind the fingers.

Head:


The head is simple and attractive. The large sweeping helmet is layered on top of the iconic spherical cockpit. The mono-eye is able to swing left and right and the front section of the head lifts up to allow access to the cockpit hatch.


The neck joint allows the head to have an excellent range of motion, and it integrates well into the torso crunch mention above.
Backpack:

This part of the build begins with the funnels. Unfortunately, there's no getting around the repetition of these pieces. The 24 fins for the funnels in particular are a bother. The RG funnels are very similar to the MG in construction.

The backpack features several hatches that can swivel open to reveal more internal details. One element of the backpack I really didn't care for were the fuel tanks because they have a seam running down the center. These fuel tanks are the one and only negative element on this kit.


The funnel racks operate very similarly to the MG. Once the rack is opened the grey interior piece rises up. A small chunk of the black rack is also able to slide out and away from the back of the rack for added gimmickiness.
Weapons:

The Sazabi's iconic beam shot rifle (basically a big beam shotgun) has a movable slide and it features a number of pops of red detail from the interior parts.


The beam tomahawk features a variety of strike semi-translucent yellow effect-parts. The color on these effect-parts is very striking, and the pinch of opaque white adds more tangibility to the effect. The beam tomahawk can be used as a single or double sided axe or beam saber. When not in use it is stored inside of the shield.


Also included are two standard beam sabers. Compared to the gigantic beam tomahawk-saber hybrid above, this is a bit lackluster.


Predictably, the Sazabi's shield is also quite large. It features a good amount of molded detail and several areas where the back armor platting pokes through the red. The shield plugs into the forearm using three plugs. This holds the shield into the arm and should reduce the chances of scratching the paint.

The RG Sazabi comes with a 'postcard' sized sheet of RG style decals, including many gold and silver foils. The white RG decals are somewhat similar to the Ver. Ka style design.


Apologies in advance for some of these poses; they're meant to illustrate the flexibility of the design, and don't necessarily look cool.

Oof! But at least the legs held their position.

The Sazabi has no issues holding the shield in whatever pose you choose!

Funnels activate!


I know that some people will be curious to know how the RG stacks up against the MG Sazabi Ver. Ka. I've already witnessed some uninformed opinions from builders that haven't touched the RG yet. So here's the perspective of someone who has tackled both. I built the Master Grade Sazabi Ver. Ka in 2017. It's a build that I enjoyed for the most part, and I'm very proud of the finished product. But, one negative that the MG Sazabi Ver. Ka has is that it has like four dozen verniers and each of those has a yellow insert, and they're a pain in the butt to sand and clean up. Mercifully, the RG Sazabi fixes this by combining some verniers and eliminating others. The MG has more gimmicks, but the RG's gimmicks are better incorporated into the design and less frustrating. The only element that I lament is that the RG doesn't include a set of waterslide decals. In time I am positive that Bandai will release a decal set for this kit. Overall, I would describe the RG Sazabi as a smaller and more streamlined version of the MG. And in closing, I will likely never agree to build another MG Sazabi Ver. Ka, but I'd happily build another Real Grade Sazabi.
Comments
Post a Comment