Tutorial: Scratch Building Skirt Detail
Intro:
A lot of older MGs and modern HGs leave large hollow or poorly detailed areas behind the kit's skirts. In this tutorial I'll show you the technique I prefer to cover up this hollow area. This technique involves layering two pieces of pla-plate together and then attaching them to the part. The advantage of the method that I use is that it's easy and versatile.
Tools & Materials:
Plastic plate .5 and .15 mm (or similar)
Metal Ruler
X-Acto knife
Plastic Cement
Panel line scribers
Pin vice and drill bits
Tutorial:
This is the front skirt of the MG Freedom. You can see that there is some molded detail inside of the skirt, but, it's otherwise hollow and plain.
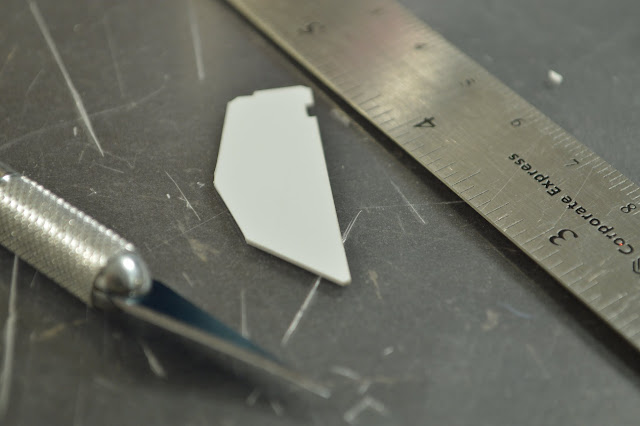
The first step requires you to trace the outline of the skirt. I needed to cut a notch in the .5mm pla-plate to accommodate the ball joint as it sits proud on the skirt instead of flush.
While holding the part down as a stencil I used the X-Acto knife to trace and cut out the pattern.
I then retraced the pattern twice with a pencil on .5 mm pla-plate and twice on the .15mm pla-plate. Retracing the part this way adds a little extra material to each potential part. The extra material will make modifying and trimming the part down to size more forgiving later down the road.
I used the X-acto knife and ruler to cut out the second part. (Pro Tip) when you cut out the pla-plate with the X-acto knife make multiple light passes instead of trying to cut through it in one pass. After cutting out the piece use a file or sand paper to clean up the edges.
I drew a pattern on one of the .15mm cutout. You can make your pattern as simple or as complex as you want. In the next few steps I will cut out the counters (typography term). The .15 mm cutout will add dimension to the final product. There are two techniques to accomplish this to get different effects.
For rounded corners a pin vice to make hole at each intersection of the lines within the areas you will cut out. This technique takes a bit of practice when placing the pin vice.
At this point you can use a file to very gently clean up the cuts that you made.
You can use this piece as a stencil for the other .15mm plate.
For the second part I cut it out only used the X-Acto knife to create sharp corners. The area that had parts removed can be neatened up with a file at this point.
You can add extra detail by scribing panel lining on .5 mm cutout or using a pin vice to add holes to the .15 mm cutout.

Once you are satisfied with the details on both panels you can align and cement the .15 mm and .5 mm plates together. In this example I used the notch I created earlier in the build as a register to align the parts.
Once the two cutouts have had time to cure and fuse together, they need to be glued the skirt. Make sure you give the cement time to set before moving onto the next step. When placing the back onto the skirt I made sure that the pla-plate overhung along each edge. Then using a X-acto knife I trimmed the excess down to make sanding easier.
This is the most time consuming part, I used a combination of files and sand paper to gradually bring the pla-plate flush to the edge of the skirt. There is no "trick" to this part of the process, just work gradually and check your progress frequently.
We're basically done at this point. When you prime these parts you may find tiny gaps where the pla-plate didn't adhere perfectly to the skirt. You can fix this with putty, primer and sanding.


Comments
Post a Comment