Start to Finish HG Kshatriya Part 5: Finishing
HG Kshatriya Wrap Up
Surprise! The last chunk in this series is NOT going to be a video! The Kshatriya series has dragged on for nearly a year in large part due to the issues associated with video production along with my general lack of motivation to deal with them. Instead, I will be wrapping up the Kshatriya series with this ‘after report’. For those of you that would like to see some video segments for this project, you can find a few drafts here on my youtube page.
Detail Painting
Panel Lining
Decaling
Topcoat
Hit the bump for the full post.
Detail Painting:
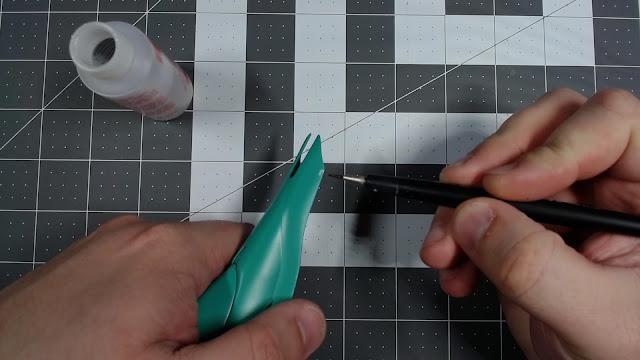
Detail painting is one of those techniques that every modeler should have in their skill ‘toolbox’. I used to just mask and airbrush every detail. However, masking every little thing is a huge time sink and the results don’t often match the time and effort invested.

My preferred paint brand for hand painting is Vallejo. It’s water-based, less toxic than enamel or lacquer, very forgiving to apply and easy to remove. I prefer to paint out of a pallet and only use a small amount of water to get the paint to a brushable consistency. I’m using a basic small flat paintbrush for the larger pieces and a smaller round brush for the smaller areas.

There aren’t many additional color applications to pick up on this model. I chose to add grey paint to the ‘pipes’ on the shoulders to either side of the head; the thruster vents on the legs, the indents on the rear skirt and the vents added to the legs.

I’m using Vallejo Mecha Color’s Phantom Gray, this paint is already very thin out of the bottle. To thin the paint to the right consistency I only needed a wet brushes worth of water to get the paint to the where I needed it. I applied two thin coats of grey to achieve the coverage needed.

If you would like to see painting in action you can check out this video here.
Panel Lining:
Most people that are familiar with gunpla are also probably familiar with panel lining as a concept. There are several ways to apply panel lines such as with markers, pencils, and washes. In this section, I will describe how to use Tamiya’s panel lining wash. Here’s a quick disclaimer before we start. For some reason, the plastic that Bandai uses is prone to cracking once it is exposed to the solvents found in many enamel products. I strongly recommend that you do not apply an enamel based wash such as Tamiya’s panel lining wash onto unpainted plastic.
When done properly panel lining is an easy way to enhance the appearance of your kit quickly. And, because we re-scribed many surfaces of the Kshatriya back in the modification video, we have a lot of additional panel line detail, not present in the original.
If you would like to see this process in video you can find two videos here:
Video 1
Video 2
Decaling:
Decaling is a subject that I have covered in some detail in a few other places. But, for the sake of completeness, I will cover it again in its entirety here.
For this kit I am using several decal sets from Bandai:
GD-76 HG Unicorn
DX-06 P-Bandai multiuse decal set for UC Gundam
If I had to choose my decal sources again I would likely have just used two sets of GD-85 decals from the Sinanju. They’re the right size and they have the right ‘feel’ but there just aren’t enough of them to fill out the Kshatriya in a single pack.
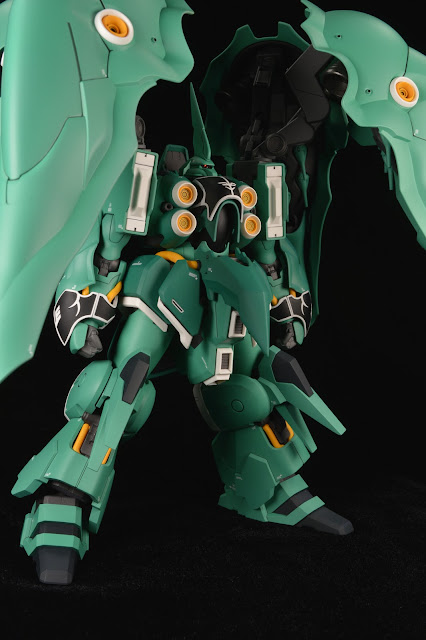
None of the decals on these sheets are numbered, which makes laying out a decal scheme very difficult. If you want to exactly match the decal scheme I have, you can reference the finished photos of the kit here.
You’re going to need a few other tools to complete this step:
- A small dish of lukewarm water
- Tweezers (self-closing is recommended)
- Hobby knife
- A toothpick
- Q-tips or hobby swabs
- Micro Sol/ Mr. Mark Softer
- Micro Set/Mr. Mark Setter
The process for applying decals is very simple.
Cut the decal(s) that you need out as you need them.
Nudge the decal into the final position on the model.
Using the q-tip or hobby swap gently push down or roll over the decal until the decal is flush with the part and water has been removed.
Allow the decal to adhere to the part before applying the Micro Sol/Mark Softer. Only apply enough of either solution to wet the decal, do not allow the solution to pool or bead on the model or decal. Too much decal solution can stain the paint or decal.
OPTIONAL If you have a stubborn decal that WILL NOT adhere for some reason you can use Micro Set/Mr. Mark Setter to improve adhesion. I rarely need to do this step, your mileage may vary.
Topcoat:
In terms of the basic material handling, tools, process, and technique necessary to properly topcoat a kit I’ll refer people back to the video on painting the Kshatriya here. If you haven’t seen that part already I would recommend that you should watch the video and then come back to finish this part of the post.
Topcoat is essentially a clear coat applied to a model to seal, protect and provide a luster to a model kit. It comes in a few different varieties ranging from the flat matte look to a high gloss. The vast majority of my kits are flat coated. I prefer this finish as it makes the model look less ‘toy-like’.

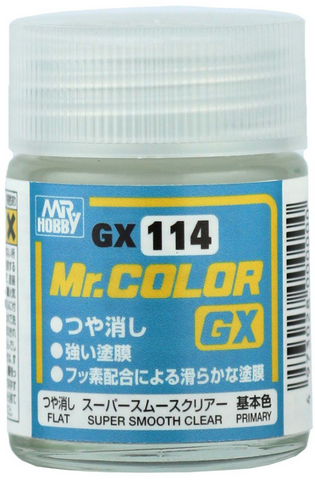
My preferred brand is Mr. Color GX #114. It’s a great flat coat product that doesn’t affect the base color. Some topcoat products will impart a white ‘powdery’ look when applied, #114 doesn’t do this.
I applied the #114 using two coats of #114 applied a few hours apart. The topcoat was mixed in a ratio of 2 parts Mr. Leveling thinner to one part topcoat. I prefer to separate the kit into large component parts (legs, feet, arms, hands, etc) and then paint the sub-assemblies. I believe this leaves a more consistent finish across the kit.
Sometimes, but not always I’ll then assemble the smaller sub-assemblies into larger ones and apply a thinner coat of the topcoat to further blend the finishes. However, this is highly dependent on the structure of the kit, this was not something I did in the case of the Kshatriya.
Once the coats of the topcoat Have been sprayed I will leave the kit to cure for several hours or overnight. This is the final stretch, so don’t get impatient! Once everything has cured complete final assembly.
Conclusion:
The Kshatriya is finally done, this project stretched out over the better part of a year, mostly down to the video production timeline and getting fixated on finishing other builds. I am happy it’s over, and it’s definitely provided some direction on the future start to finish projects. If you’ve stuck around for the whole series, thank you! I hope that you learned something from this project. This series will be back in the future. However, next time the series will be completed in its entirety before it is posted.
If you'd like to see more photos of the completed kit you can view it here


Comments
Post a Comment