
Building for Beginners tips and tricks

Building the Justice Gundam for Beginners
Welcome to Building for Beginners (BfB), it's for builders just getting their feet wet in the gunpla hobby. The goal of this tutorial series is to show new builders how to build a great looking model out of the box using only basic tools.
If you're already building at this level, and you want to take your skills even further; check out the Sinanju start to finish series. The Sinanju series covers a wider range of more advanced techniques.
Some sections of this tutorial will feature "Pro tips". These tips will offer some additional advice related to the content of that portion of the tutorial; which while it may not be essential it is helpful.
I will be building the Real Grade Justice Gundam for this tutorial. I chose this kit for a couple of reasons: the Justice packs a lot of detail and features into a small kit, the color scheme is a nice departure from the normal tri-color Gundam, and it's very affordable at under $30 with free prime shipping through Amazon (If you have a college .edu email address you can get six months of amazon prime and instant video for free).
The topics to be covered are:
Removing parts from the sprue, sanding, and assembly
Panel lining
Decals & details
Topcoating
Hit the bump for the full article!
Tools Needed by topic:
If you would like to follow along with this tutorial you should have the following tools:
Removing parts from the sprue, sanding, and assembly:
Cutting Mat
Side Cutters
X-acto Knife
Sand Paper
Optional:
Spudger
Panel lining:
Lining Markers
or
Gundam Marker
Q tips/cotton buds
Decals & details:
Tweezers
Q tips/cotton buds
Topcoating:
Mr. Top Coat Flat
Finding and removing parts from the sprue and sanding
Let's get the vocabulary lesson out of the way first. When you hear someone mention a sprue, they're talking about the plastic 'tree' all of the parts come attached too. The sprue is a left over from the plastic injection molding process. Once you have removed all of the parts from the sprue you can recycle it. I will typically keep all of the sprues from a kit together until I'm done assembling the model. I do this to ensure I don't accidentally throw away any parts I need, but missed.
Sprues are organized by letters or sometimes letters and a number.

Parts are listed by number.

If you ever need to order a replacement part from a service like Gentei Kits, keep in mind you'll need to know the combined plate and part number. If you've already thrown your plates out, don't worry! You can usually find this information on first two pages of your manual.
Removing parts
Removing parts and sanding seems pretty basic right? Well when you're not painting you need to take more time and be more careful, rough cuts, stressed plastic and sanding scratches will be visible even under a topcoat.
When you cut out a piece leave some of the sprue material on the part. Do no cut right up against the part; you're more likely to damage or stress the plastic this way. Once the part has been freed from the sprue you can use your nippers to trim the sprue nubs down further. Always try to leave a millimeter or two of nub attached to the part.


Pro Tip: Multiple cutters
I usually use two pairs of side cutters when cutting parts from the sprues. I use an old dull pair to cut through the thick parts of the sprue, and I use a newer sharper pair for the nubs closer to the part. This process prolongs the life of your 'good' pair of side cutters and reduces the likelihood of damaging the part or stressing the plastic.

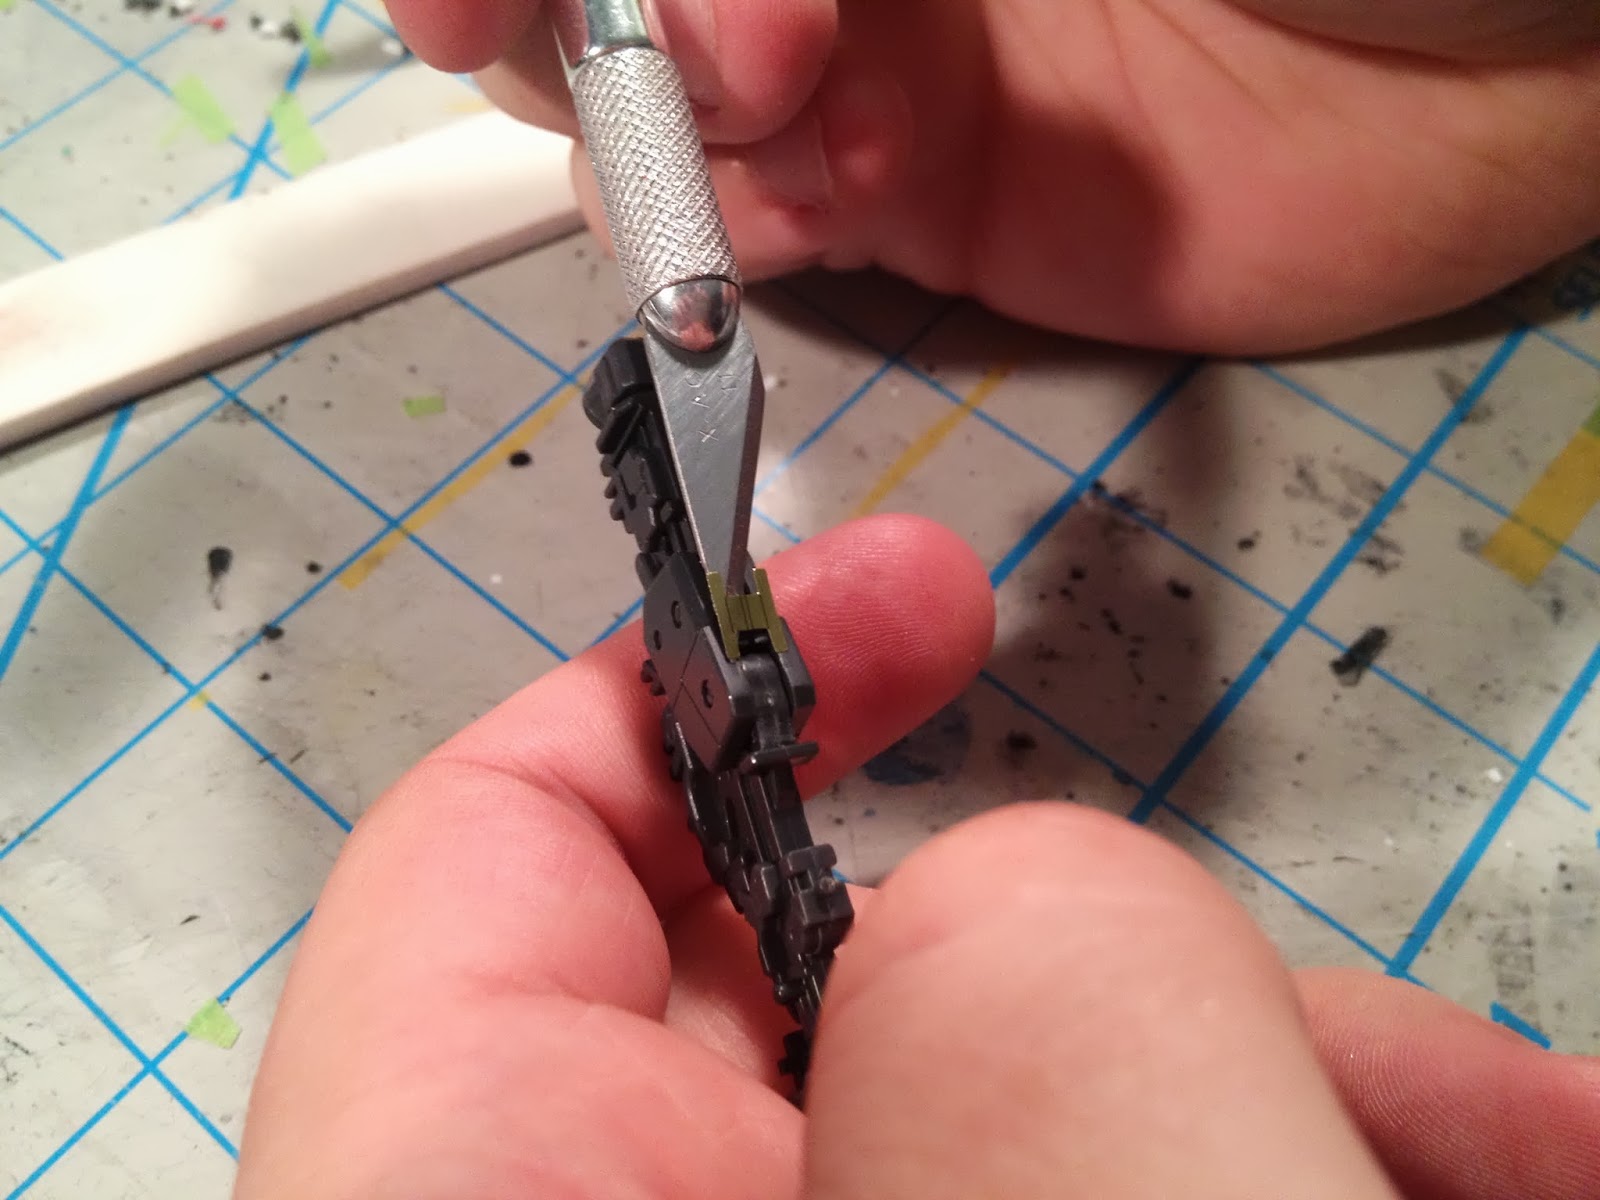
Use your X-acto knife to gradually shave down the nub, until you are almost flush with the plastic.
When using your X-acto knife remember two rules, never cut towards yourself, or 'in' to the plastic. If you slip in either case you'll do damage to yourself, or to the part.
Example: WRONG!

Example: Right!

Once you have shaved down the nub you will transition to using sandpaper to gently remove the remainder. Because we won't be painting this kit, it's important to use a really fine grade of sandpaper to minimize the size of scratches. A can of topcoat can hide the fine scratches from high grit sand paper.
For this kit I am using 1000, 1500 and 2000 grit sandpaper. The sandpaper pack listed in the tools section above contains all three grits. You can find finer grit sandpaper or files than this, but after 2000 girt you're not going to see a difference in the quality of the model after topcoat.
Sanding with sand paper is a very easy process. You can either cut out small squares of sand paper and sand by hand.


Or you can wrap a larger piece of sand paper around a stiff flat object like a tongue depressor/Popsicle stick.

Try to sand in a single direction while applying even force to your sanding implement.

Once the part is cleaned up, it's ready to assemble.

Pro Tip: Real Grade Frames
The 'Real Grade' line of Gundam models uses a special type of preconstructed frame called the "Action Frame". If this is your first time building a RG take special care while cutting the action frame from the sprue. Each frame piece has numerous connectors both to the sprue and to other pieces of the frame.
Before adding parts on top of the frame slowly bend the joints of the action frame to loosen them. Sometimes the joints will be too stiff to bend smoothly after the armor has been attached. Action frames can easily break when forced, and they're expensive to replace because Bandai makes you purchase the ENTIRE action frame sprue!
Panel lining
Here are a few general tips to get you started panel lining:
- Allow the ink of your lining marker to dry completely before wiping away the excess.
- Always panel line before adding decals.
- You can always add more, panel lining is very forgiving on an unpainted kit!
Here's a example of a lined and unlined leg side by side.


The difference is pretty striking. It's amazing how a lining marker can improve the overall look of a part.
Lining is a very quick and simple process. Place the tip of your lining marker into the groove of a panel line and simply fill it in.


The line I drew is too thick, and I went out of the lines. We can fix this really easily by applying a small amount of rubbing alcohol to a tissue and then lightly rubbing perpendicular (not parallel) to the panel line.


There are a couple of details that we can line other than panel lines, such as indents, and edges.
Indents are any of these larger depressions in the plastic. Lining these features is simple.
First start by outlining the indent.


Once the indent is outlined fill in the indent completely.


Pro Tip: Take care of your lining markers
Panel lining markers dry out really quickly, so make sure you always replace the marker cap when you're not using them. The marker's felt tip is also very soft and delicate, use a light touch when you apply the lining, and try not to press too hard. One marker should last several kits if you take good care of it!
Decals & details
Before you start decaling here are a few tips.
- Use a pair of tweezers, or the blade of your x-acto knife to lift and place decals.
- Keep the adhesive side of the decal as clean as possible. Debris will make the seams of the decal stand out.
The inner frame pieces that fit onto either side of the knee have a spot for a decal on the back. Because we're going to place armor, on or around this area it will be easier to apply that decal now.
Real Grade kits have lot of decals, fortunately they're really easy to apply.
We're going to start with some of the shiny foil decals on the back of the knee joints.
I used the tip of the x-acto knife to pry the decal from the sheet. Leave the decal on the blade of the x-acto knife can make positioning the sticker much easier.

Once the decal is in the position you want, use your thumb to press the decal down.

Many RG decals have a lot of 'extra' clear decal material around the design that can be removed to improve the look of the decal. Use an x-acto knife to cut the extra material out from around the marking while it's still on the decal paper.


Some decals like this Eternal or "ET" decal need to be placed over a large panel line. You can improve the fit of these decals by running your x-acto blade down the panel line.


Once the decal has been cut you can use a q-tip or your thumb to massage the decal down.
The decal will sit flush, and the seams should be less noticeable.

The RG kits usually provide 'extra' decals, which will allow you to modify the look of the kit to a degree. Decals 96 and 97 can be used on the rear skirt armor.


Topcoating
Before you start topcoating here are a few tips.
- Always choose an acrylic based topcoat for unpainted kits. Lacquer based topcoats can make plastic brittle.
- Topcoating needs to be done in a well ventilated area (seriously some brands of topcoat are toxic), additionally it's better to let the parts dry in an area that is free of airborne debris/insects/pollen etc.

- Warm up your topcoat. Place your can of topcoat in a warm water bath for 5 minutes before you spray (don't try anything crazy like boiling or microwaving the can) hot water out of the tap is fine.
- Shake your spray can for several minutes to mix up the contents, and shake briefly in between spraying seperate parts.
- Try to topcoat when the weathers right, overly humid or cold weather will adversely effect how your topcoat turns out.
- Keep the spray can moving while you paint. Spray multiple thin coats. One thick coat of topcoat is going to frost and look awful.
- Keep your can of topcoat about 1 foot (about 30 cm) away from the part while spraying.
- Start and stop spraying 'off' of the part. If you start or stop while you're 'on' the part the nozzle of the spray can may sputter large globs of topcoat onto your part.

Pre topcoat Photos:
Before I topcoat the kit. Here's what the kit looks like uncoated.


It doesn't look bad! But we can make it look a lot better with only a little bit of effort.
Topcoating:
Topcoating is the final step. the topcoat will: seal in the decals and lining we've added, add a layer of protection to the kit and leave a flat finish.
First get your parts ready to spray. I have attached all of my parts to bamboo skewers using alligator clips.

The kit has been broken down into large component parts; arms, legs, head, etc.
I have a chunk of styrofoam I'll stick the skewers into once they have been sprayed.

Like the basic tips mentioned above make sure you keep the can moving as a you spray.


Don't be afraid to adjust the direction you're spraying; try to keep the wind to your back.

Pieces with moving frame components like this leg will need to be sprayed multiple times to cover areas of the frame that are covered by the armor.


Large pieces can be unwieldy.


All parts have been topcoated. Now let them dry for a few hours.


Completed
Once your topcoated model has completed dried, reassemble it and admire your handsome model.


Take Aways
You don't need to be some sort of wunderkind to build an attractive model. It only takes a handful of tools and materials to significantly improve the quality of your finished kit.
This comment has been removed by a blog administrator.
ReplyDeleteAs someone who is just starting out, I'm excited to see the amount of content you have. Looking forward to reading through your blog. Hope I can start something just as good and thorough!
ReplyDeleteAre those toothless alligator clips? Of not is there any worry about mark's from clip teeth?
ReplyDeleteNo, they do have teeth. However, I've never had an issue with them damaging the parts or paint.
DeleteHey man I just have a few questions regarding top coats I’m going to use it in bare plastic I’ll be washing the parts to remove the mold release to help the top coat adhere better but here’s where I’m stuck at, I want to use tamiya accent color so I want to but a base coat of clear coat to protect the plastic from the liner, but what should I do you stated that laquer based topcoat can damage bare plastic (and I’ve been unfortunate to experience this) with my mg freedom 2.0 I was using mr hobby super clear (matte) so I want to know if using mr hobby topcoat (blue can) as a base gloss coat would cause any issues with tamiya panel liner particularly the process of cleaning the lines with thinner or lighter fluid
ReplyDelete