
WIP: Liger Zero Schneider
If you don't currently follow me on Google+ consider checking it out and subscribing. Google+ is where a lot of my minor and off topic content ends up. Below are a collection of posts from Google+ assembled to show the WIP for the Liger Zero!
I started this WIP off with a video. I wanted to show off some of the successes and frustrations of the kit in it's early stages.

That same night I showed off the first big bundle of primed parts. Like always I'm using Mr. Surfacer 1200. In this photo the small bundle at the bottom were the parts that came out correctly molded. The larger pile required additional sanding to clean up edges and flashing.


These next four photos followed a few days later. I was off to a good start and premixing my colors a few days in advance helped to streamline the process.


The "not quite black parts" were painted with a mix of mostly black, and some pinches of brown, white and grey. On this model the black parts function very similar to the inner frame on a MG or PG gundam. They also had the most surface area of any color on the build.

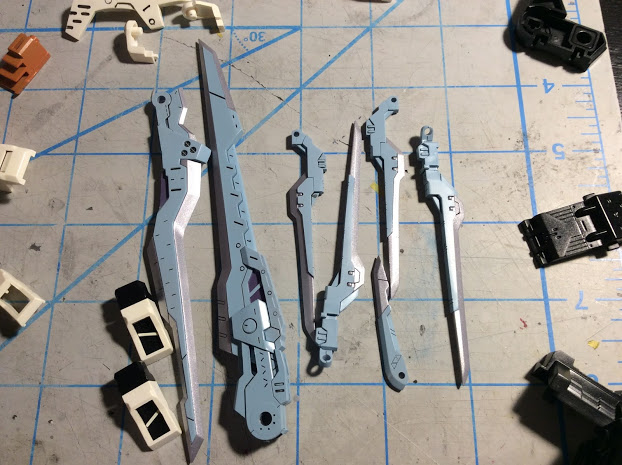
The little recesses on both sides of the back blade and the front blade arguably took the second most time to mask and paint. Each of the side recesses were masked and painted individually instead of at the same time. I chose to do this because the narrow raised piece between the two recesses would have made masking more difficult.


Some of the sub assemblies are starting to come together in these photos. You can also make out of the hand painted detail in the kit like the silver bolts in the hubs of the legs, and the orange armor. The little white slash in the vents needed to be masked on; as the part is entirely molded in black plastic.


The dark navy colored areas on this kit were the most time consuming areas to paint overall. Additionally each is in a fairly high profile area; if you're painting one of these kits; make sure these areas are masked cleanly!


The little hexagons on these light blue parts weren't too bad to mask. I made a bunch of small spray shields that I was able to pickup and move around, reducing the amount of time I spent taping.


I ran into a issue with parts binding here. Unfortunately it required some sanding and touching up these parts.

I reused and modified the spray shields from a few photos above to quickly paint all of the circles found molded into the armor.

Here's the last photos of the parts while they were still clean and unweathered.


I'm currently weathering the kit in stages; I'm alternating between clear coat, Tamiya modeling master and Vallejo's desert dust wash.
I started this WIP off with a video. I wanted to show off some of the successes and frustrations of the kit in it's early stages.

That same night I showed off the first big bundle of primed parts. Like always I'm using Mr. Surfacer 1200. In this photo the small bundle at the bottom were the parts that came out correctly molded. The larger pile required additional sanding to clean up edges and flashing.


These next four photos followed a few days later. I was off to a good start and premixing my colors a few days in advance helped to streamline the process.


The "not quite black parts" were painted with a mix of mostly black, and some pinches of brown, white and grey. On this model the black parts function very similar to the inner frame on a MG or PG gundam. They also had the most surface area of any color on the build.

The little recesses on both sides of the back blade and the front blade arguably took the second most time to mask and paint. Each of the side recesses were masked and painted individually instead of at the same time. I chose to do this because the narrow raised piece between the two recesses would have made masking more difficult.


Some of the sub assemblies are starting to come together in these photos. You can also make out of the hand painted detail in the kit like the silver bolts in the hubs of the legs, and the orange armor. The little white slash in the vents needed to be masked on; as the part is entirely molded in black plastic.


The dark navy colored areas on this kit were the most time consuming areas to paint overall. Additionally each is in a fairly high profile area; if you're painting one of these kits; make sure these areas are masked cleanly!


The little hexagons on these light blue parts weren't too bad to mask. I made a bunch of small spray shields that I was able to pickup and move around, reducing the amount of time I spent taping.


I ran into a issue with parts binding here. Unfortunately it required some sanding and touching up these parts.

I reused and modified the spray shields from a few photos above to quickly paint all of the circles found molded into the armor.

Here's the last photos of the parts while they were still clean and unweathered.


I'm currently weathering the kit in stages; I'm alternating between clear coat, Tamiya modeling master and Vallejo's desert dust wash.
Comments
Post a Comment